Showing posts with label baking. Show all posts

Friday, 8 February 2019

VALENTINES DAY TREATS: QUICK + EASY

Hello everyone! With Valentine's Day fast approaching in just six days, i thought this would be the perfect way to share some quick and easy treat ideas for the themed holiday. For me when it comes to Valentine's day i straight away think of all things pink and red themed, as well as anything yummy and chocolatey. Creating something yourself doesn't have to require a lot of time/skill, as there are so many simple recipes and packaged up nicely can make the perfect gift for someone special (or simply to be eaten yourself of course)...


1. heart shaped cookies ( simple sugar cookie recipe )
Baking cookies doesn't have to be difficult, especially if you follow a simple sugar cookie recipe. You can create sugar cookies for pretty much any season/holiday, simply by switching up the cutter/style of topping you are using. For example for Valentine's opt for a heart shaped cutter to shape the cookie and use pink/red/white frosting/icing or sprinkles. 

2. chocolate covered oreo's 
Probably one of the quickest and coolest ideas for creating a Valentine's treat is simply by covering/dipping some Oreo's with melted Chocolate or Candy Melts, then finishing off with toppings of your choosing. Some of the perfect toppings for decorating the Oreo's with are pink or red coloured Sprinkles, M&M's, Love Hearts and you could even incorporate a lolly stick into the centre of the cookie to create an Oreo Cake Pop.

3. covered strawberries
Another idea similar to covered Oreo's is of course the classic Strawberries covered in Chocolate, that being said you don't just have to opt for a classic Milk Chocolate look. A great way to achieve that perfect Valentine's theme is to dip the strawberries in either Pink Candy Melts or White Chocolate that has had a small amount of Pink Food Colouring to it. Just like any other treat you can decorate as you wish with selection of different toppings, edible Glitter looks stunning on the Strawberries as do little white sprinkles.

4. valentine's movie night popcorn
I would be happy with this treat on any movie night not just for Valentine's, as who doesn't love popcorn and a movie? A way to give your regular cinema sweet popcorn a makeover is to simple incorporate some Valentine's themed sweets or chocolates to the popcorn mixed in a bowl. A personal favourite of mine is either M&M's or Malteasers. If you are making your own popcorn from scratch, you could also add a little food colouring to make the popcorn Pink.

5. valentine's themed bark
Another great no-bake dessert idea which can be decorated differently all depending on the holiday or occasion is of course bark or rocky road, which the only baking that is required is to simply melt some chocolate. If you do want to get a little more adventurous you could create a Valentine's Day appropriate Red Velvet bark, by following this recipe here or many more that are featured on Pinterest.

6. rice krispie valentine's hearts
 If you are a sucker for a Rice Krispie treat or you know someone else that is, then this is going to be the perfect no bake Valentine's treat and another one that is so easy to do. All you need to do is follow a simple Rice Krispie treats recipe using melted marshmallow, cut out into heart shapes with a heart shaped cutter and either leave them plain, add some food colouring to the mixture or top with coloured icing/chocolate to decorate.

Catch up on my previous post: here

xo.

Friday, 7 December 2018

THE BAKES OF CHRISTMAS PAST

Hello everyone! In previous years by now i would already got at least two or three Christmas themed baking posts ready to go, oh how times have changed. Since changing the way i eat/lifestyle at the start of the year (which i have touched on in previous posts), i have obviously cut down the amount of unhealthier options by a lot. That being said i do plan on squeezing an all new baking post before the big day later on in the month, until then i am trying to hold off. Keeping in mind that not every one likes to resist the urge to indulge at this time of year, i thought i would share with you a round up of some of my personal favourite festive bakes...


carrot and gingerbread cupcakes | click to bake |
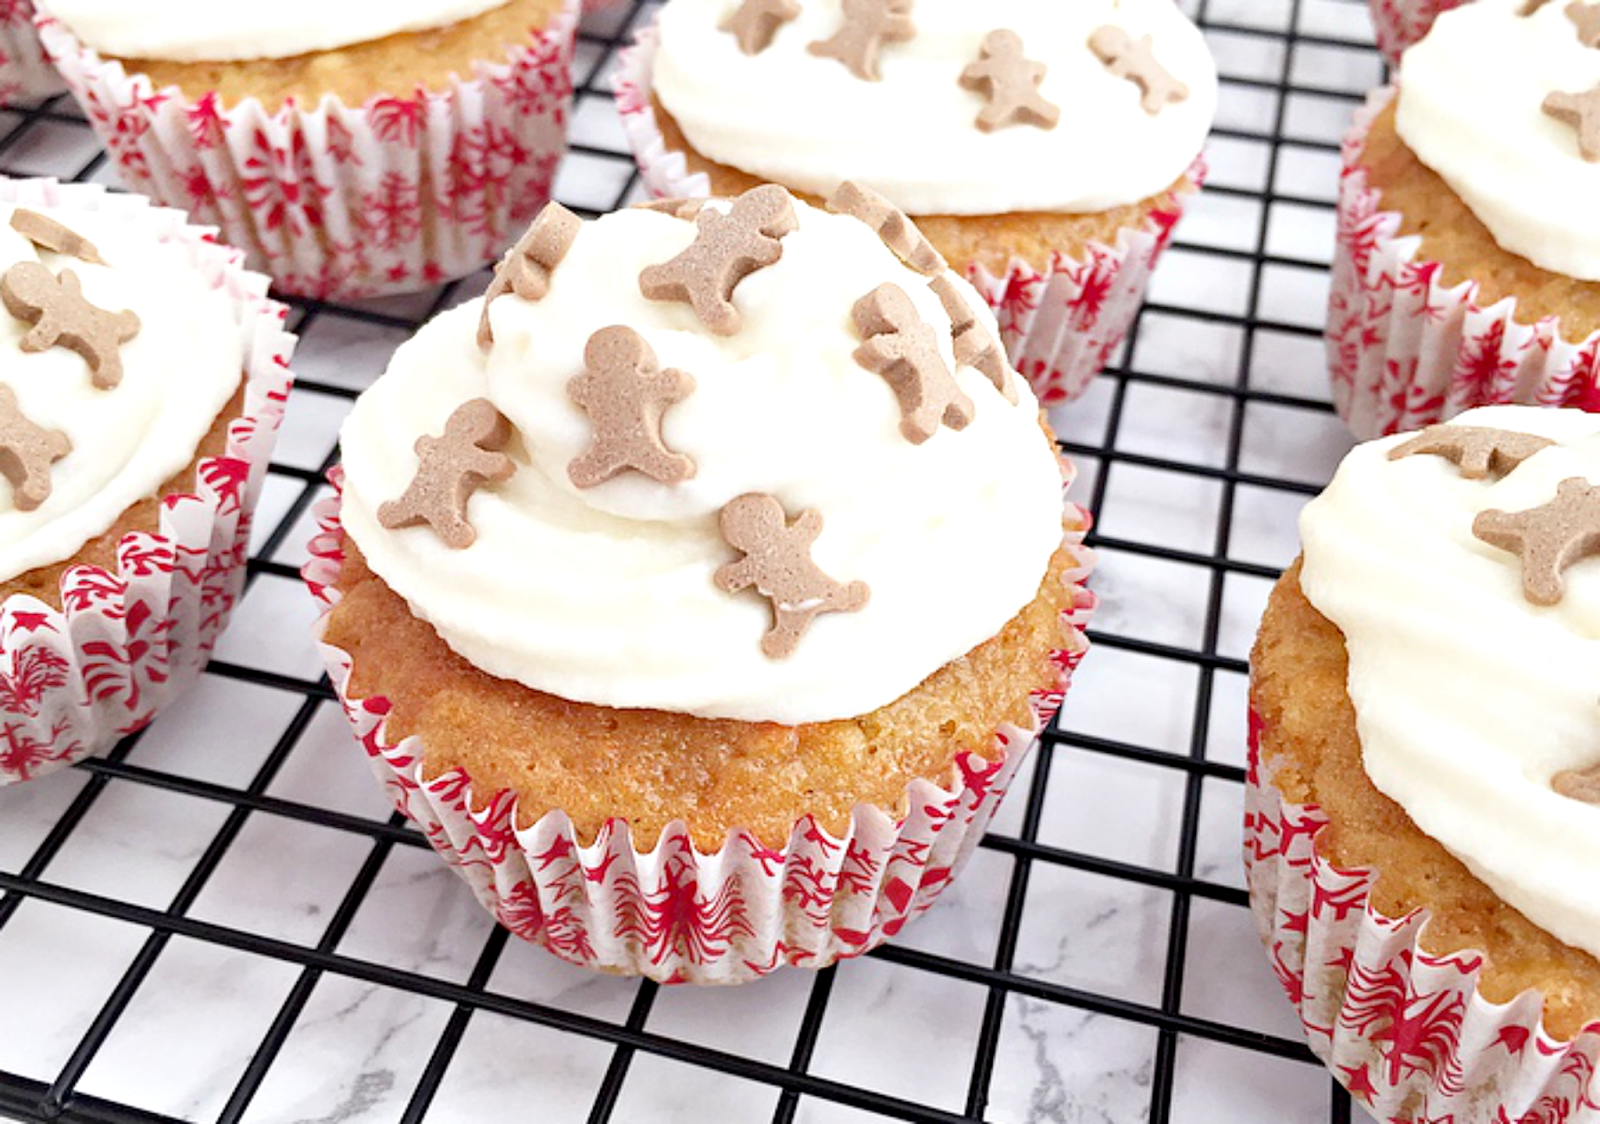
First up is a twist on a cake that Nigella Lawson did last year, but rather than one large cake i made the recipe into cupcake form. Personally for me carrot cake is hands down one of my favourite, along side gingerbread so combine the two together and you are in for a treat. Cupcakes are such an easy thing to make, as you basically have a classic base then all you can do to switch things up is add in any flavouring and decorate how you choose.


mincemeat, pecan and cinnamon crumble bars | click to bake |
Just looking back and remembering how yummy these crumble bars were, just makes me want to either lick the screen or cave and make them right now. I am such a mince pie fan when it comes to Christmas desserts and this is the perfect twist on a classic, which is just a little more modern with the added flavours and textures from the pecans and cinnamon. 


chocolate holly cupcakes | click to bake |
Next up is definitely one for any chocolate lovers out there and even more so if you love both cupcake and anything chocolatey. Yet again this is another cupcake recipe that you can use and decorate as you choose to do, but i personally love how with the added holly shaped icing on top makes the cupcakes look more like Christmas puddings. Another great decoration topping idea is to add some different coloured M&M's placed around and on-top of some black pen icing, for the appearance of fairy lights.

Want another Christmas themed read? Catch up on my previous post for more:

xo.

Friday, 22 December 2017

CHRISTMAS BAKING #4: THE BAKES OF CHRISTMAS PAST

Hello everyone and welcome back to the forth and final "Christmas Baking" post this December! If you haven't seen any of this years baking instalments so far, i will link them at the end of this post for you to catch up on. With that in mind for the final instalment i thought i would switch things up by doing something different, in the form of sharing a selection of the Christmas bakes from last years blogmas.


| gingerbread cupcakes two ways | click to bake |
First up we have probably one of the most traditional flavour when it comes to Christmas and that is gingerbread, last blogmas i shared this gingerbread cupcakes with two different ways in how to decorate/serve them. The first way was to simply bake/buy some little gingerbread men and place over top of the cinnamon flavoured frosting, the second way was to simply crush some gingerbread/gingerbread men up with a rolling pin before sprinkling over top of the same cinnamon flavoured frosting.


| frangipane mince pies | click to bake |
Next up is a twist on the ever so classic mince pie (which is a pretty big deal if you are from the UK at Christmas) and to me at Christmas i eat as many of them as possible, because they are simply so yummy. Usually the "lid" of the mince pie will either be a simple pastry lid or a pastry star, but i wanted to do something different so i added this yummy frangipane topping instead. If you aren't sure what frangipane is, it is basically an almond-like flavoured cake topping and i also share how to make that from start to finish too.


| hot chocolate cupcakes | click to bake |
Finally we have a cool spin with a classic drink that we all tend to indulge in during the Christmas/Winter months and that drink is a steaming cup of hot chocolate. So for last years blogmas post i shared this super simple hot chocolate cupcake recipe, complete with "whipped cream" style frosting, marshmallows and candy cane decorative straw, which really reminds me of the whole frozen hot chocolates you see in movies.

Catch up on this years "Christmas Baking" instalments...

Merry Christmas Everyone!

xo.


Sunday, 17 December 2017

CHRISTMAS BAKING #3: CARROT AND GINGERBREAD CUPCAKES

Hello everyone and welcome back to another instalment of my "Sunday Christmas Baking" series this December! When it comes to Christmas is it honestly Christmas without something Gingerbread related, whether that be a Starbucks gingerbread latte, a gingerbread man/house or a delicious gingerbread scented candle. With that in mind i wanted a different type of cupcake rather than just gingerbread, then i saw Nigella make a carrot and ginger cake on TV and decided to go from there with an added twist.


to make the carrot and gingerbread cupcakes you will need:
| 165g grated carrot | 160g caster sugar | 150ml sunflower oil | 2 large eggs | 150g plain flour | 50g dried mixed fruit | 1tsp ground ginger | 1/2 tsp bicarbonate soda | 1/2 tsp baking powder |

method:
First things first, you are going to want to pre-heat your oven to gas mark 4/180c/350f and then line your baking trays with the cupcake cases. Then you are going to want to start on your cupcake mixture, take the caster sugar, sunflower oil and eggs and place them all in your mixer or bowl whichever way you prefer to mix your mixture. Then you are going to want to start mixing the ingredients on a low speed and gradually add the flour, ground ginger, bicarbonate soda and baking powder, then slowly start to speed up the mixer. Mix all together until combined and smooth. Once combined you are going to want to take your dried mixed fruit and grated carrot and fold the two ingredients into the mixture. Before baking you are going to want to take your mixture and spoon an amount into your cupcake cases and place in your pre-heated oven for 22-25 minutes, once out of the oven leave to cool completely.


to make the frosting you will need:
| 300g icing sugar | 50g softened butter | 125g mascapone | gingerbread men sprinkles |

method:
For the frosting you are going to want to take the softened butter and place it in a bowl/mixer, beat slightly before adding in the mascapone and beating the two together. Slowly add in the icing sugar (it is better to sift in the icing sugar) and continue to mix until combined. All that is left to do is spoon or pipe on the frosting onto your completely cooled cupcakes and decorate with some little gingerbread men sprinkles (or any sprinkle of choice) or you could simply lightly dust on some ground cinnamon.

Catch up on my previous "christmas baking" posts here...

xo.

Sunday, 10 December 2017

CHRISTMAS BAKING #2: MINCEMEAT, PECAN AND CINNAMON CRUMBLE BARS

Hello everyone and welcome to the second instalment of my "Sunday Christmas Baking" series in December! Mincemeat/Mince pie is such a cult classic when it comes to Christmas time and i swear if i am near a mince pie, i just can't seem to say no i love them that much (i mean i guess it is justifiable as calories don't count at Christmas right?). That being said for this instalment i wanted to do something a little different using mincemeat and i came across with this yummy take on a Christmas classic, including two other flavours i love nuts and cinnamon.

  
to make the mincemeat crumble bars you will need:
| 225g cold unsalted butter diced + extra for greasing | 225g plain flour | 100g semolina | 100g caster sugar | 75g chopped pecans | 450g mincemeat | 1/2 vanilla extract | icing sugar + cinnamon for dusting |


method:
First things first, you are going to want to pre-heat your oven to gas mark 3/136c/275f and grease a rectangular, shallow baking tin well with butter. Next you are going to want to put the plain flour, semolina and the 100g of sugar into a bowl/mixer then add the butter and vanilla then mixing until the mixture just begins to stick together into pea sized lumps to form a crumble mixture. Put half of the mixture into the well-buttered baking tin and press firmly over the base in an even layer using the back of a metal spoon. Next you are going to want to place your mincemeat over the crumble mixture in an even layer. The with the remaining crumble mixture, stir in the chopped pecans and remaining sugar before sprinkling evenly over the top of the mincemeat. All that is left to do then is bake in the oven for 50/60 minutes or until golden brown.

Catch up on last weeks Christmas baking instalment HERE...

xo. 

Sunday, 3 December 2017

CHRISTMAS BAKING #1: CHOCOLATE HOLLY CUPCAKES

Hello everyone and welcome to the first baking instalment of December! I wanted to kick Christmas baking off with something simple, yet obviously yummy and chocolate cupcakes tick both of those boxes. This recipe could of course be used at any time of year, all you would have to do is switch up the decoration on top and you would be good to go. Also this particular chocolate "frosting" topping is a new recipe and it is literally heavenly.


to make the cupcakes you will need:
| 12 cupcake cases | 125g self raising flour | 50g cocoa powder | 175g softened unsalted butter | 
| 175g caster sugar | 3 eggs | 1tsp baking powder |

method:
First things first, you are going to want to pre-heat your oven to gas mark 4/180c/350f and then line your baking trays with the cupcake cases. Then you are going to want to start on your cupcake mixture, take the sugar, butter and eggs and place them all in your mixer or bowl whichever way you prefer to make your mixture up. Then you are going to want to start mixing the ingredients on a low speed and gradually add the sifted flour, cocoa powder and baking powder, then slowly start to speed up the mixer. Mix all together until combined and smooth. Next you are going to want to take your mixture and spoon them into your cupcake cases and place in your pre-heated oven for 22-25 minutes, once out of the oven leave to cool completely.


to make the frosting you will need:
| 75g dark chocolate | 35g unsalted butter | 100g mascarpone | 165g icing sugar |

method:
First things first you are going to want to melt the dark chocolate in a bowl, over simmering water and leave to cool. Then to make the frosting/topping you are going to want to beat the butter and the mascarpone together before adding half of the sifted icing sugar, then beat until well combined before adding in the other half of the sifted icing sugar. Add in the cooled melted dark chocolate and mix again until well combined, by adding the dark chocolate it makes the frosting this beautiful moose-like topping that honestly tastes so delicious. All that is left to do then is decorate using some red and green ready roll icing cut into holly shapes and dust with a light sprinkling of icing sugar for a Christmas-y/Snowy effect.

See you tomorrow for an all new post at 5PM GMT...

xo.

Monday, 23 October 2017

HALLOWEEN EYEBALL CUPCAKES

Hello everyone! If you read last Monday's post where i talked about pinterest halloween treats inspiration, then you will know that i was looking for some serious inspiration to create something fun/new to bake this Halloween. With that in mind and after shopping around to find some different Halloween inspired toppings other than sprinkles, i finally came up with this super cool yet creepy eyeball decorated cupcakes.


to make the cupcakes you will need: 
175g caster sugar
175g butter
150g self raising flour
25g coco powder
1tsp baking powder
3 eggs
12 cupcake cases
250g mascarpone cheese
2tbsp icing sugar
1/2tsp vanilla
red icing pen
eyeball jelly sweets


method:
First before you start on the cupcake mixture, you are going to want to pre-heat your oven to 180c/350f/gasmark4 and line the baking tin/s with the 12 cupcake cases. Taking a bowl/mixer, sift in the flour, cocoa powder and baking powder before adding in the butter, sugar and eggs. Mix all of the ingredients together until well combined and a smooth-like consistency. Divide the mixture into your pre-lined cupcake cases (i went with these super cute halloween designed cases from Sainsbury's), filling each case around 2/3 full and bake in the oven for around 20-25 minutes or until springy to touch. Once out of the oven leave to cook completely before decorating with the mascarpone topping and design. To make the mascarpone topping, take the mascarpone, icing sugar and vanilla into a bowl/mixer and mix under well combined/smooth texture. Pipe or spoon on the mixture to the cooled cupcakes, this is going to be the "white part" of the eyeball. Taking your eyeball sweets (i picked mine up from poundland) and placing one in the centre of the topping of each cupcake. Then finally taking your red icing pen and roughly drawing "blood-shot" looking lines around the eyeballs for a spooky effect.

Catch up on my previous post HERE...

xo.

Monday, 16 October 2017

PINTEREST HALLOWEEN TREATS INSPIRATION

Hello everyone! So for today's post i am back with another Pinterest inspiration/recipes i want to try post, but this time things are getting a little spooky *inserts evil laugh here*. Halloween is just a couple of weeks away now and i always like to do some form of treat making, so i like any other time i took to Pinterest to look for inspiration and i just couldn't not share with you all some of the amazing creations/recipes that are on there.


So i love love love candy bark/rocky road when it comes to a no-bake dessert and when i saw this Halloween themed OREO candy bark come up on my Pinterest feed, my eyes immediately lit up. The great thing about candy bark or a rocky road, is you can completely customise it however you want, whether you want it to look super scary/glory or light hearted and fun looking if you are catering to younger children.  

For me these cheesecake truffle mummies look like the perfect treat for a Halloween party, whether that be for adults or children and the recipe also seems super simple. What i love about this recipe is not only the finished product is Halloween themed, but also the taste/flavour is also as it is pumpkin infused.

When i saw these OREO pops i thought to myself, why have i never thought about doing this? Using OREOS on a stick and dipping/decorating them is literally as simple yet effective, as if it would be when you opt for a huge marshmallow. Personally i know i would prefer to eat an OREO pop and i will definitely be giving these a try out during or on Halloween itself.


This cake is another dessert that as soon as i saw it it, i was practically dribbling, i mean how amazing and moist does this cake look? Yes i just used the word moist, but it does! I actually did something a little similar last year, but in the form of cupcakes and they tasted amazing. You can check out that blog post, if you didn't catch it the first time here. 

Sometimes i like to opt for the more healthy choice in the dessert area, which always ends up being a vegan/dairy or gluten free option. This pumpkin cookie recipe really caught my eye, as they look seriously indulgent without being and yet again it is pumpkin flavoured, which i love. If vegan/gluten-free desserts are more your thing, then i also did a blog post on amazing pumpkin brownies, which you can catch up on here.

Finally we have a more on the fun/technical bake in the form of a cauldron designed cupcake, which looks amazing. This recipe is another one from a blog called apumpkinandaprincess.com and honestly there are so many amazing baking/dessert recipes on there as well as DIY's for Halloween, which i will be looking for more personally in the future. It will not be Halloween if there isn't some form of cupcake created in my house, so definitely stay tuned to find out what theme/design i decide to go for soon!

Catch up on my previous post HERE...

xo.

Wednesday, 21 June 2017

PINTEREST RECIPES I WANT TO TRY

Hello everyone! When it comes down to looking for good food inspiration, what better place to go than Pinterest am i right? There are thousands of great recipes from easy lunch ideas, to healthy recipes and my personal favourite ironically the opposite of healthy, the dessert recipes that i drool over as i scroll through my app. For today's post i thought i would share with you some of the recipes i have discovered on Pinterest and want to try/make myself. Also it came to my attention that i haven't shared a "what i ate in a day" type post for the longest time, so i am thinking one might make an appearance in a post sometime soon.


I love porridge or oatmeal whatever you prefer to call it and i have seen a few different recipes for baked porridge and to me it sounds amazing, so add blueberry and coconut into the mix and i am sold with this particular recipes (except i will probably skip adding the banana).

How could i not want to give this particular recipe a try, as it has two of my favourite things in the dish prawns (shrimp) and pasta, the two just go hand in hand for me. I actually have a pasta/linguine recipe post on my blog, which you can catch here and trust me it is yummy!

I love fish but i don't think i have actually ever had it in curry before, which is odd as i love both things separately. This seems like it could be one of those really yummy yet healthy and quick dinner recipes, as it only has four steps involved (that ticks all of the boxes for me).

We actually already gave this one a try out but we didn't have the smaller ramekins like the recipe suggests and we also added a couple of different ingredients to it, but i will definitely have to get some and give this recipe a go the exact way it is meant to me served.   


I love love love anything sweet potato, especially baked sweet potato and i always make this particular Jamie Oliver one with cheese, chilli and garlic that i am obsessed with. That being said it is always good to try some new toppings and this lentil stuffed sweet potato, sounds amazing!

I couldn't not included at least one naughty dessert even though i am trying to not look, but this peanut butter snickers cookies recipe looks and sounds too good not to try out. Yet again another two things i love peanut butter and cookies, so why not mix the two together and be extra naughty, i mean if you are doing it you might as well go all out right?

Another coconut curry recipe but this time in the form of a soup, with one of my favourite things butternut squash in fact i think it is my favourite flavour soup. So add coconut and some spice into the mix and i am completely sold, this one also looks super simple/quick to make.

Finally besides pasta dishes, fajitas are one of my favourite dinners and whilst i was browsing one day for different fajita recipes i came across this one. I think is is such a cool/different way to have fajitas, as you could cut them up, serve with wraps or leave whole and serve with some roasted sweet potatoes like the recipe. I will definitely be trying this one out sooner, rather than later.

Wednesday, 11 February 2015

VALENTINES DAY RED VELVET CUPCAKES

Hey guys, i hope you are all having an amazing day whatever you are up to! Seeing as Valentine's Day is literally a few days away, i thought it would be fitting to share with you this amazing/yummy "Red Velvet Cupcakes" recipe because if you can't have an excuse to crave that chocolate fix on and around Valentine's Day when can you?


For the cupcakes you will need:
60 g unsalted butter at room temperature
150 g caster sugar
1 egg
20 g cocoa powder
40 ml red food colouring
½ tsp vanilla extract
120 ml buttermilk
150 g plain flour
½ tsp bicarbonate of soda
1½ tsp white vinegar
12 cupcake cases

For the frosting you will need:
250g icing sugar, sifted
80g unsalted butter, room temperature
25ml whole milk
a couple of drops of vanilla extract

Method:
Preheat the oven to 170°C/325°F/gas mark 3. Put the butter and the sugar in a freestanding electric mixer with a paddle attachment (or use a handheld electric whisk) and beat on medium speed until light and fluffy and well mixed. 
Turn the mixer up to high speed, slowly add the egg and beat until everything is well incorporated. In a separate bowl, mix together the cocoa powder, red food colouring and vanilla extract to make a very thick, dark paste. 
Add to the butter mixture and mix thoroughly until evenly combined and coloured (scrape any unmixed ingredients from the side of the bowl with a rubber spatula). 
Turn the mixer down to slow speed and slowly pour in half the buttermilk. Beat until well mixed, then add half the flour and beat until everything is well incorporated. 
Repeat this process until all the buttermilk and flour have been added. Scrape down the side of the bowl again. 
Turn the mixer up to high speed and beat until you have a smooth, even mixture. 
Turn the mixer down to low speed and add the bicarbonate of soda and vinegar. Beat until well mixed, then turn up the speed again and beat for a couple more minutes. 
Spoon the mixture into the paper cases until two-thirds full and bake in the preheated oven for 20 to 25 minutes, or until the sponge bounces back when touched. A skewer inserted in the center should come out clean. 
Leave the cupcakes to cool slightly in the tray before turning out onto a wire cooling rack to cool completely. 
For the frosting beat the icing sugar and butter together in your electric mixer on a medium-slow speed until the mixture comes together and is well mixed. Turn the mixer down to a slow speed. Combine the milk and vanilla extract in a separate bowl, then add them to the butter mixture a couple of spoons full at a time. Once all the milk has been incorporated, turn the mixer up to a high speed. Continue beating until the frosting is light and fluffy, at least 5 minutes. The longer the frosting is beaten the fluffier it becomes. 
Once the cupcakes are completely cooled all is left to do is spoon or pipe on the frosting and decorate to your choice. 


Sunday, 21 December 2014

BLOGMAS DAY TWENTYONE: FESTIVE GINGERBREAD SHAPES


Hey guys, i hope you are all having an amazing day and welcome to blogmas day twenty-one! For today's post i thought i would share with you these super cute and easy to make "gingerbread shapes". You can get a hold of a wide variety of festive shaped cutters pretty much anywhere, i have seen so many and they are all adorable! If you want to recreate these fun festive gingerbread shapes then please keep reading...

For the gingerbread you will need:

(Makes 20-25 shapes all depending on the size of your cutters).

450g plain flour (plus extra for dusting)
2tsp ground ginger
1tsp ground mixed spice
2tsp bicarbonate of soda
115g butter (plus extra for greasing)
100g golden syrup
115g light muscovado sugar
1 beaten egg

Method:

Preheat the oven to 160c/325f/gas mark 3, then grease three large baking trays. 
Sift the flour, ginger, mixed spice and bicarbonate of soda into a large bowl. Place the butter, golden syrup and muscovado sugar in a saucepan over a low heat and stir until melted. Pour onto the dry ingredients and add the egg. Mix together to make a dough. The dough will be sticky to start with but will become firmer as it begins to cool down. 
On a lightly floured work surface, roll out the dough to about 3mm's thick and then stamp out the shapes with the cutters of your choice and place onto the prepared baking trays. Bake in the preheated oven for 15-20 minutes or until firm and lightly browned. Once cooked remove from the oven and leave to cool for a few minutes before transferring them to a cooling wrack to cool completely. Once completely cooled all that is left to do is decorate them how ever you want.


You could also place the cookies in cute wrapping and give to someone as a gift!


Wednesday, 17 December 2014

BLOGMAS DAY SEVENTEEN: "CRISPY"PUDDING CAKES

Hey guys, i hope you are all having an amazing day and welcome to blogmas day seventeen! For today's post i thought i would share with you these super quick and easy cakes, which don't even require using an oven.. as long as you've got a hob and a fridge you are good to go ha ha. These are a perfect christmassy treat which could easily be whipped up and given out to any guests you might have over the holiday's or even just for yourself...


To make the "crispy"pudding cakes you will need:

Crunchy Nut Cornflakes (or ordinary cornflakes)
Milk Chocolate
Ready Roll Icing (red and green for holly decoration)
Icing Sugar (for decoration)
Cupcake Cases
Holly Shaped Cutters (or you can print one from online)

(This recipe is great as you can pretty much guess who much or little ingredients you need, all depending on how many you are wanting to make).


Method:

Take a saucepan of shallow boiled water and place it on the hob with a low heat. Place a heat proof bowl on top of the saucepan and add the chocolate broken into small pieces. Leave the chocolate to melt completely but make sure you don't allow the water to touch the bowl otherwise the chocolate will be ruined. Once the chocolate is completely melted take the bowl off the heat and on to a work surface, place the cornflakes crushed up into the melted chocolate and stir in (add as many hand fulls of cornflakes as you feel you need). Once all combined place into your cupcake cases and pop into the fridge for around 30 minutes to set.
Meanwhile...
Roll out your green icing making sure you place some icing sugar down first so that it doesn't stick. Once you have rolled the icing out, cut your holly leaved shapes using your stencil and a knife or your cutter. Then taking small pieces of your red icing, roll into tiny ball shapes to make the berries.
To make the gloopy icing topping, take some icing sugar in a bowl and adding some water, mix the two together until it becomes a paste. 
All that is left to do is once the cakes are set is to spoon some of the gloopy icing into the center of the cakes and arrange the holly leaves and berries on top.


Saturday, 13 December 2014

BLOGMAS DAY THIRTEEN: HOMEMADE NUTTY CHOCOLATE TRUFFLES

Hey guys, i hope you are all having an amazing day whatever you are up to and welcome to day thirteen of blogmas! A great way of giving a gift to someone at Christmas is to give them something homemade which can not only cost left but be a more thoughtful gift and who doesn't love chocolate? I have a great yet simple recipe to create homemade truffles, which would be perfect gift wrapped as a small present for someone. If you want to find out how to make these nutty chocolate truffles then please keep reading...


To make the truffles you will need:

120ml double cream
200g chocolate 
(whatever your preference is either milk or dark)
200g chocolate for the chocolate covering broken up
1 tbsp of butter
5-6 tbsp crunchy peanut butter


Method:

Put the cream in a small pan and heat it until it is almost at a boil, then switch off the heat and add the chocolate and butter. Take the pan off the heat and leave it to stand for around 6-8 mins without stirring it. After the time is up begin to stir the ingredients until it is all combined, the mixture will be shiny and smooth. Pour the mixture into a bowl and then gently stir in the peanut butter, leave the mixture to cool down a little and then place it in the fridge for a few hours (over night is even better).

Take the firm mixture out of the fridge and line a large tray with grease-proof paper. Using a melon baller or your clean hands take 1 tbsp or 2 tsp's of the chocolate and quickly roll into a ball and place on the tray and then repeat with all the chocolate and then they are good to eat. You can add a finishing touch to the chocolates by dipping them into more chocolate. 

Melt the remanding 200g of chocolate either for 20 seconds in the microwave in sections stirring in between or melt in a bowl over a pan of boiled water. All that is left to do then is dip the chocolates into the melted chocolate and then place back on the tray. To add a finishing decorative touch you can sprinkle some ground almonds or flaked almonds on top. If you are placing the chocolates in a gift wrapped package or box make sure the chocolate is completely set before you do so.


I hope you have found this homemade gift idea useful in some way and even if you don't want them for a gift, make them away as they are so good!

Saturday, 6 December 2014

BLOGMAS DAY SIX: CHRISTMAS COOKIE CRUNCH CUPCAKES

Hey guys, i hope you are all having an amazing day and welcome to day six of blogmas! Today's post is the first of a many baking posts i plan on doing during the build up to Christmas. First up is these oh so yummy "Christmas Cookie Crunch Cupcakes" because who doesn't love a good cupcake? If you want to find out how to recreate these cupcakes then please keep reading...


To make the cupcakes you will need:

12 cupcake cases
175g self raising flour (sifted)
175g caster sugar
175g butter 
1 teaspoon vanilla
1 teaspoon baking powder
3 large eggs

To decorate you will need:

300g icing sugar (sifted)
100g butter
40g cocoa powder (sifted)
40ml milk
decorations of your choice


Method:

Firstly you are going to want to pre heat your oven to gas mark 4/180c/350f and then line your baking tins with the cupcake cases. Then you are going to want to start on your cupcake mixture, take the sugar, butter and eggs and place them all in your mixer or bowl whichever way you prefer to make your mixture up. Then you are going to want to start mixing the ingredients on a low speed and gradually add the sifted flour and baking powder, then slowly start to speed up the mixer. Mix all together until combined and smooth. Next you are going to want to take your mixture and spoon them into your cupcake cases and place in your pre heated oven for 25 minutes. Once removed from the oven make sure you leave the cupcakes to cool completely before decorating. 

To make the frosting:

Place the icing sugar, butter and cocoa powder in your mixer and beat the mixture together on a medium to slow speed until the mixture binds together. Turn the mixer down to a slow speed and the milk to the mixture a few spoon fulls at a time then turn the mixer up to a high speed. Continue to mix the mixture until it is light and fluffy this will take around 5 minutes. 

All that is left to do then is spoon or pipe your frosting onto your completely cooled cupcakes and decorate as you please. I went for a selection of different crunchy toppings from this toppings turner i bought which includes: nut crunch, cookie crunch, dark chocolate crunch and also orange crunch! When decorated all is left to do is eat and enjoy!


Monday, 20 October 2014

HALLOWEEN WEEK: CREEPY CUPCAKES


Hey guys, i hope you all had a great weekend and welcome to Halloween Week! For today's post i thought i would share with you these cool yet creepy cupcakes perfect for any Halloween party or just to recreate for fun. I also want to share with you a few cool ways you could decorate for this holiday in a very inexpensive way...


To make the cupcakes you will need:

175g Self Raising Flour (Sifted)
1 tsp Baking Powder (Sifted)
175g Caster Sugar
175g Soft Unsalted Butter or Light Baking Spread
3 Eggs (Whisked) 
1 tsp Vanilla Extract
12 Cupcake Cases

To make the frosting you will need:
250g Mascarpone Cheese
25g Icing Sugar
1 tsp Vanilla Extract
Decorations of your choice 

Method:

First things first you are going to want to pre-heat your oven to Gas Mark 4/180c or 350f and then line your cupcake tin with your paper cases. You are going to want to take your sifted flour and baking powder and place them in your mixing bowl, next you are going to want to add the caster sugar, butter, eggs, vanilla and begin to mix them in your mixer. (Make sure you start your mixer on a slow speed and then gradually increase your speed) Mix until combined.

Next you are going to want to place your mixture into your pre lined cases allowing room to rise and then place them in the oven for 25 minutes. Once cooked and take them out of the oven and place on a cooling wrack to cool completely before decorating. Once cool you can begin decorating... 

So once the cupcakes have cooled you are going to want to make your topping. Take your mascarpone, caster sugar, vanilla extract and mix together until combined. Once the mixture is all combined you are going to either want to pipe the topping onto the cupcake or if you prefer just spoon on the topping and smooth with a knife. All that if left to do then is to decorate the cupcakes with a design of your choice.


Now here is a few cool yet inexpensive ways to decorate for Halloween...


Table Place Settings.
You can get hold of a lot of different items to dress your table for Halloween so easily like these ones i picked up from my local supermarket.  


Candles.
Candles are a great way to add to the whole Halloween/Spooky vibe, these Sampler candles from Yankee Candle are perfect as they come in their limited edition Halloween scents. These two scents are my particular favourites and they are so inexpensive at just over £1.


My mum got this ghost tea light holder which was just too cute not to show you all. 

Tuesday, 16 September 2014

OAT AND RAISIN COOKIES

Hey guys, i hope you are all having a great day. Last week whilst watching a daily vlog by Tanya Burr i made a discovery as she was baking cookies from a recipe book from the Hummingbird Bakery and immediately after it was in my shopping basket on Amazon. Hummingbird Bakery is a company who handmake American style cupcakes, cakes, pies and brownies. They have 3 bakeries which are all based in London but obviously if you are not based in or near the area the recipe books are great as you can recreate their delicious treats!


To recreate the oat and raisin cookies in the recipe book you will need:

270g unsalted butter (at room temperature)
160g caster sugar
160g soft dark brown sugar
2 eggs
1/4 teaspoon vanilla extract 
380g plain flour
1 teaspoon salt
1 teaspoon bicarbonate of soda
1/2 teaspoon ground cinnamon
110g rolled oats
220g raisins 

This recipe makes 20 cookies (4 baking trays, lined with grease proof paper).

Preheat the oven to 170C (325F) Gas Mark 3.
Put the butter and sugars in a freestanding electric mixer with a paddle attachment (or use an electric whisk) and cream until light and fluffy. 
Add the eggs one at a time, mixing well and scraping any unmixed ingredients from the side of the bowl with a rubber spatula after each addition. 
Turn the mixer down to a slow speed and beat in the vanilla extract. 
Sift together the flour, salt, bicarbonate of soda and cinnamon in a separate bowl, add the oats and mix well. 
Add to the butter mixture and beat until well mixed.
Stir in the raisins with a wooden spoon until evenly dispersed. 
Arrange equal amounts of cookie dough on the prepared baking trays. 
Make sure that the cookies are spaced apart to allow for spreading while cooking. 
Bake in the preheated oven for 12 minutes, or until golden brown and firm.
Check them regularly to make sure they are not burning. 
When you are happy that they are cooked through, remove from the oven and leave to cool slightly on the trays before turning out onto a wire cooling rack to cool completely.  

You can find out more information about the Hummingbird Bakery here:

Or you can purchase the recipe book here:

Happy baking!


Wednesday, 13 August 2014

TRIED IT OUT TUESDAY: CHEEKY CHERRY CUPCAKES

Hey guys, i hope you are all having a great day! For today's post i am back with another cupcake recipe as it has been a while now. So if you love anything cherry flavoured or just cupcakes in general and you want to recreate them then please keep reading..


To make the cupcakes you will need:

175g Self Raising Flour (Sifted)
1 tsp Baking Powder (Sifted)
175g Caster Sugar
175g Soft Unsalted Butter or Light Baking Spread
3 Eggs (Whisked) 
1 tsp Vanilla Extract
1 Tub Glacé Cherries
12 Cupcake Cases

For the icing you will need:

225g Icing Sugar
2/3 tbsp Water
1 tsp Vanilla Extract


First things first you are going to want to pre-heat your oven to Gas Mark 4/180c or 350f and then line your cupcake tin with your paper cases. You are going to want to take your sifted flour and baking powder and place them in your mixing bowl, next you are going to want to add the caster sugar, butter, eggs, vanilla and begin to mix them in your mixer. (Make sure you start your mixer on a slow speed and then gradually increase your speed) Mix until combined.


Once combined you are going to want to add your glacé cherries (Make sure you save 12 cherries for decoration). You can either add your cherries to the mixture cut up or whole if you prefer. Slowly mix the cherries into the mixture until all combined.


Next you are going to want to place your mixture into your pre lined cases allowing room to rise and then place them in the oven for 25 minutes. Once cooked and take them out of the oven and place on a cooling wrack to cool completely before decorating. Once cool you can begin decorating... 
Take your icing sugar, water, vanilla and stir until the ingredients are all combined to make a paste.
Finally you are going to want to take you icing and spoon on top of the cupcakes how you desire and then place a whole glacé cherry on top to finish.


If you decide to give these cheeky cupcakes a go please let me know!

♥